For this post, I am going to do a tutorial for how to make a
1920s day dress.

Note: this will not be a 1920s, flapper, bright young thing
dress, but the kind of dress that women would wear every day, such as to work
or to visit friends.
I am no sewing expert, although I have made a couple of items of my own clothes before, so I will do my best to describe my method in a way that can easily be recreated.
The advantage of 1920s dresses is that they are a relatively simple style of dress to create, and
can easily be made by upcycling old clothes. Overall, the most important parts
of a 1920s dress are the dropped waist and lack of fitting to the bodice.
For more information about 1920s day dresses, please see my earlier post:
http://thatssolastcentury.blogspot.co.uk/2016/05/1920s-day-dresses-overview.html
The easiest way to make this style of dress requires:
A simple, preferably plain top with little to no fitting
A skirt in a matching or complementary colour. Ideally this
skirt would not be too flared and be about knee length. Pleats were popular
throughout the decade so I decided to go for a pleated skirt
A strip of fabric that will form the waist line. This should
complement the colours of the top and skirt.
Ideally the same fabric should be used for all three
sections but that is not always possible, for example my fabric strip is made
of a lighter cotton. This can make the attaching of the pieces harder.
In terms of pattern, block colours were common, as were simple geometric, floral and art deco patterns so depending on the level of accuracy you want try to stick to these. I decided to go for a plain top and skirt as this was easier to find, with a complementary patterned strip to provide contrast.
Colourwise, darker colours would have been more common for work, such as in shops or industry. However, paler colours were also popular, especially for visiting and other instances where there was little risk of getting dirt on your clothes. My colour choice was limited by what I could find in charity shops.
First cut your fabric strip to the correct size. Remember when measuring to include a seam allowance of around 1 inch or 2cm. I made mine 10cm high (not including seam allowance), and measured around the bottom hem of my chosen top to give me the required length. Do not measure around your hips for the strip of fabric as the straight up and down nature of the dress means that this would make it too tight.

Next, try on the top. The aim is for the strip of fabric to sit on your hips, emphasising the dropped waist effect. Find the point on the top, below which you want the fabric strip to sit.

Remember to leave a seam allowance of about half an inch or 2cm.
For me I found it best to line the bottom of the fabric strip up with the bottom of the top
Note: if the fabric you are using for the strip is particularly fine, or lace, it may need to overlap your top for its entire height.
Pin the top and strip together, with a seam allowance for both, remembering to pin with the two 'right' sides facing each other. Do the same for the skirt and strip, again with a seam allowance and 'right' sides together.

Try on the whole dress before sewing and check that the strip and hemlines are where you want them to be. If not, the height of the fabric strip can be changed. It may also be necessary to hem the skirt, or cut off the waist band to make it fit the top of the dress properly.
Once you are happy , sew the three pieces together.

Depending upon the edges of your fabric it may also be a good idea to do some zigzag stitches to prevent fraying

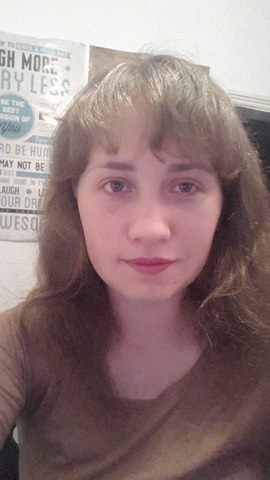
You should now have a completed 1920s style day dress:


I am wearing my dress with some black cuban heels and skin colour tights. I decided to wear white gloves and a grey cloche as it was still convention for women to wear hats and gloves when out in the 1920s. My grey cloche is a personal favourite of mine and was a large part of why I got into 1920s fashion and I did choose the colours for this dress so that they could be worn together. I am also wearing a long, dark green cardigan with bishop sleeves that would also pass for 1920s style, the belt can be used to accentuate the dropped waist of the dress. Although short, my hair is too long for true 1920s bobbed hair, but will pass. Otherwise, it could be worn back in a bun, or curled to make it shorter. In terms of make-up, I am only wearing foundation. For the majority of women, only face powder was worn everyday in the 1920s.
There will be some inaccuracies, obviously by buying the base clothes from a charity shop it is unlikely that what you will find will perfectly recreate 1920s styles with 100% accuracy. However, I think that I managed to get fairly close.